Deploy Conduktor Console on AWS with CloudFormation in 10 Minutes
Why Use a Kafka Console
Managing Kafka clusters through CLIs and scattered APIs wastes time. A console gives you topic configs, consumer lag, and data inspection in one place.
Conduktor works with Confluent, AWS MSK, Redpanda, and any Kafka-compatible provider. It supports Confluent Schema Registry, AWS Glue, Kafka Connect, and ksqlDB.
This guide walks you through deploying Conduktor on ECS using CloudFormation. The whole process takes a few clicks. For Kubernetes, use the Helm chart.
[GIF not supported - Claudiu to reupload Video]
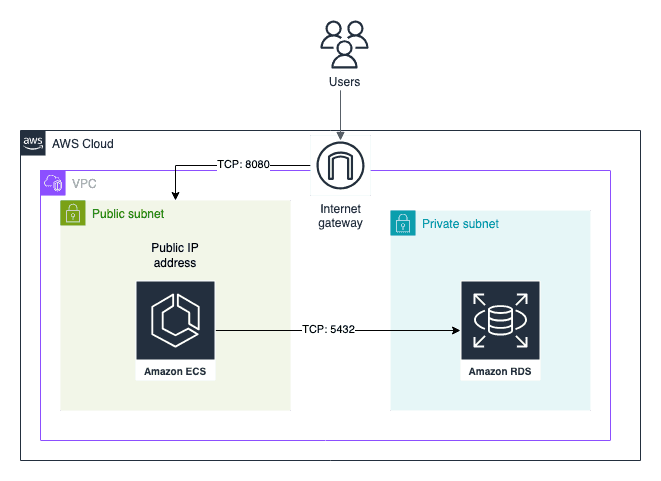
Architecture Overview
The CloudFormation template deploys:
- An RDS instance for metadata (user preferences, tags, permissions)
- Conduktor Console on ECS Fargate
- A public IP by default (configurable for private access)
Deployment Steps
This guide gets you started. Review the production requirements before deploying to production.
- Go to AWS CloudFormation
- Choose a template:
- Full template: Deploys Conduktor and all required infrastructure
- Lite template: Deploys Conduktor on existing ECS cluster and RDS
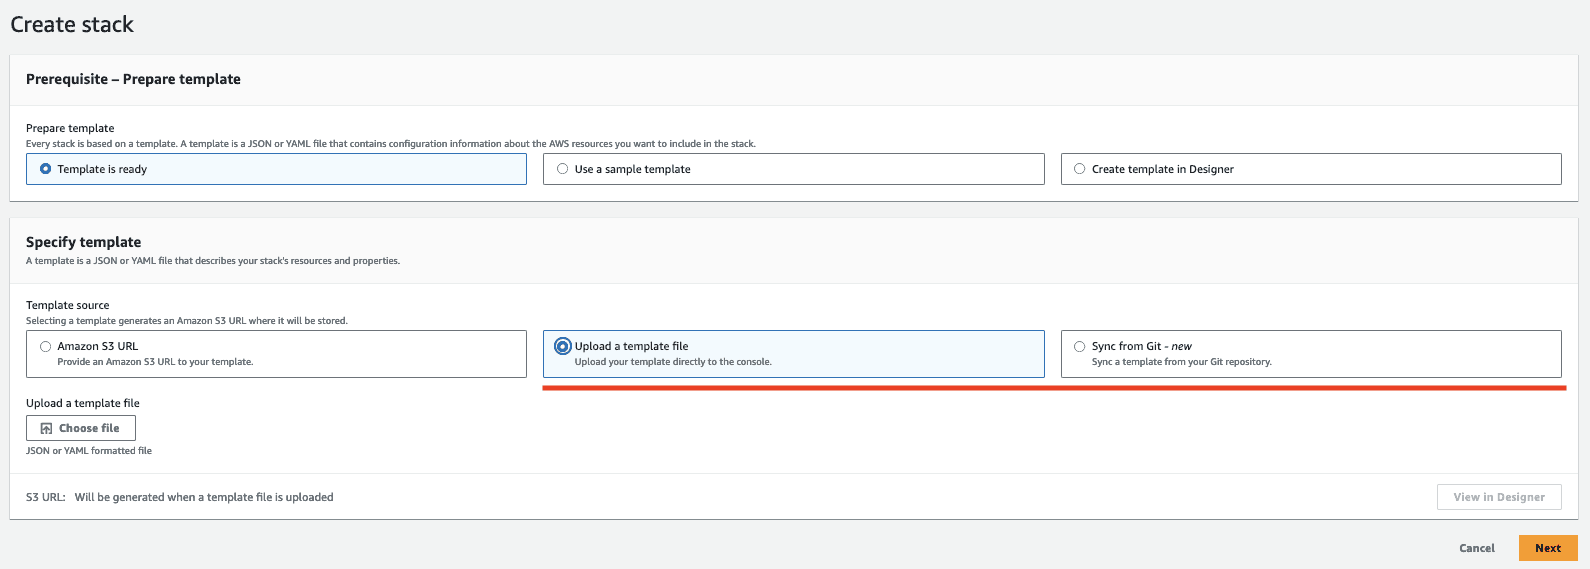
- Wait 5-10 minutes for the stack to complete
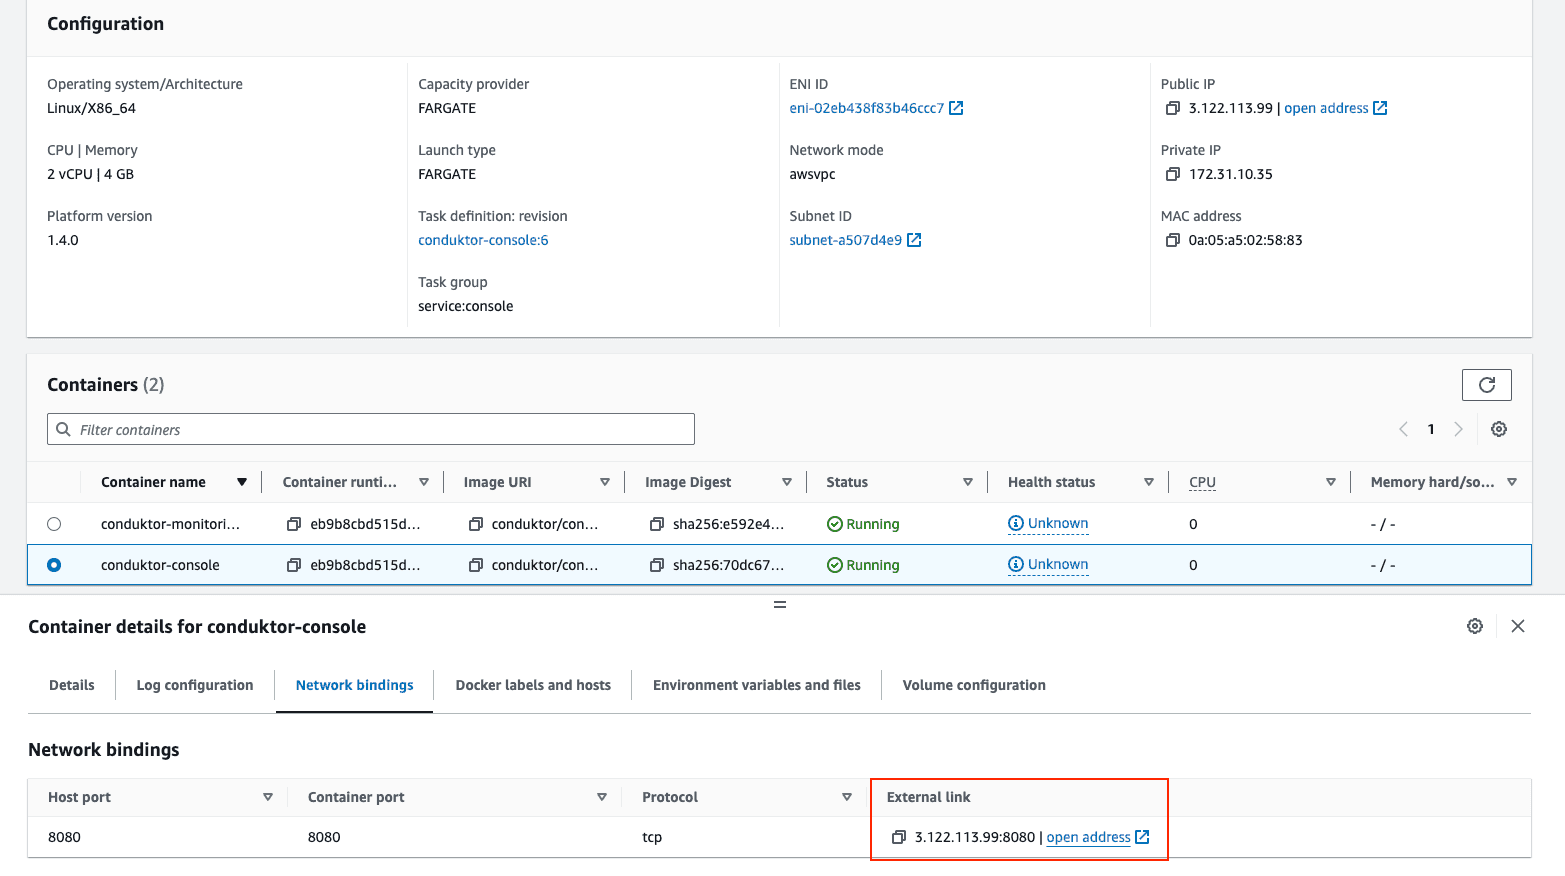
- Navigate to Cluster > Service > Task > Conduktor Console > Network Bindings and click the address
Configure Your Kafka Cluster
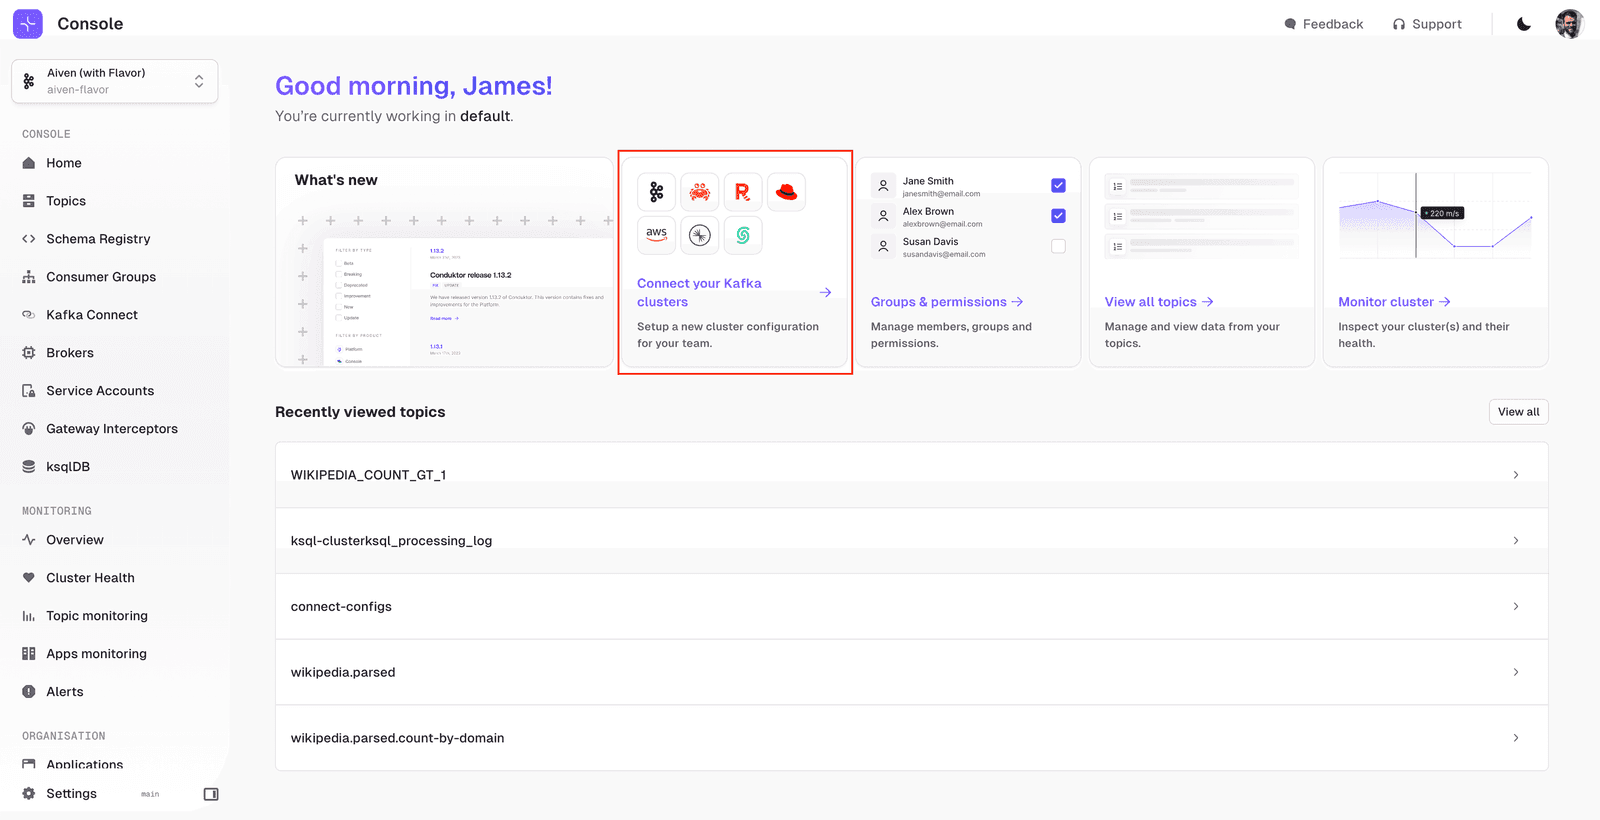
Add your first cluster:
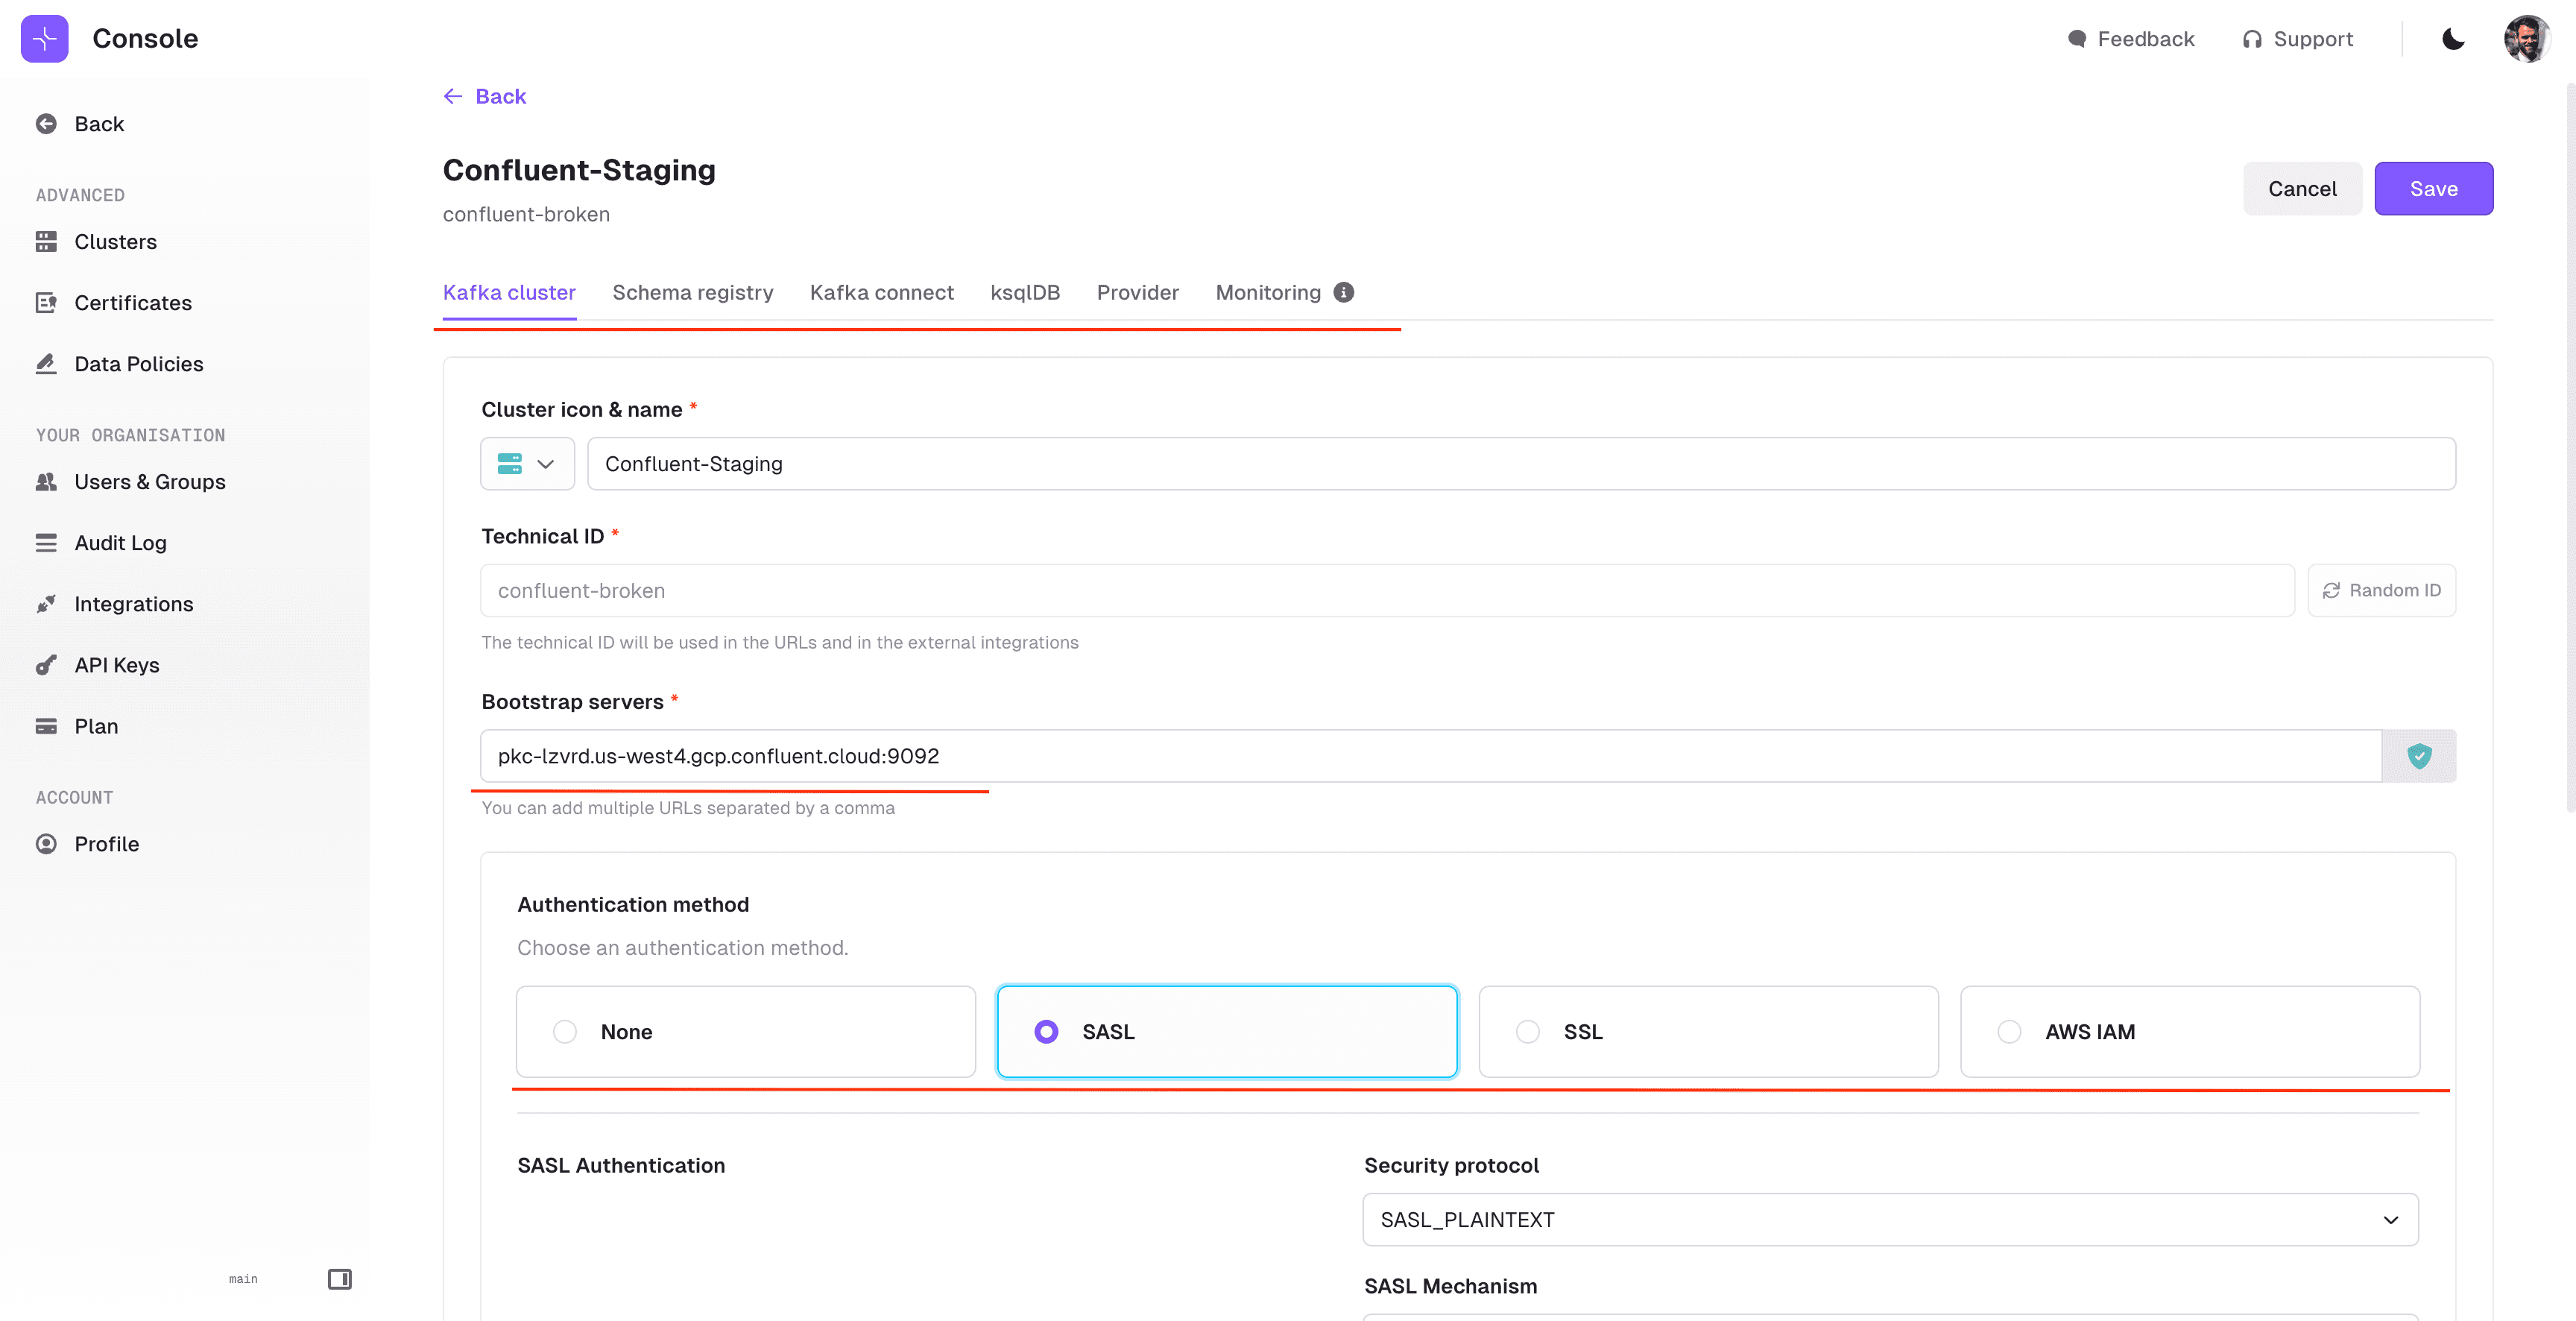
Enter your bootstrap server and authentication details. If you use Schema Registry, Kafka Connect, or ksqlDB, add those in the corresponding tabs:
Add Your Team
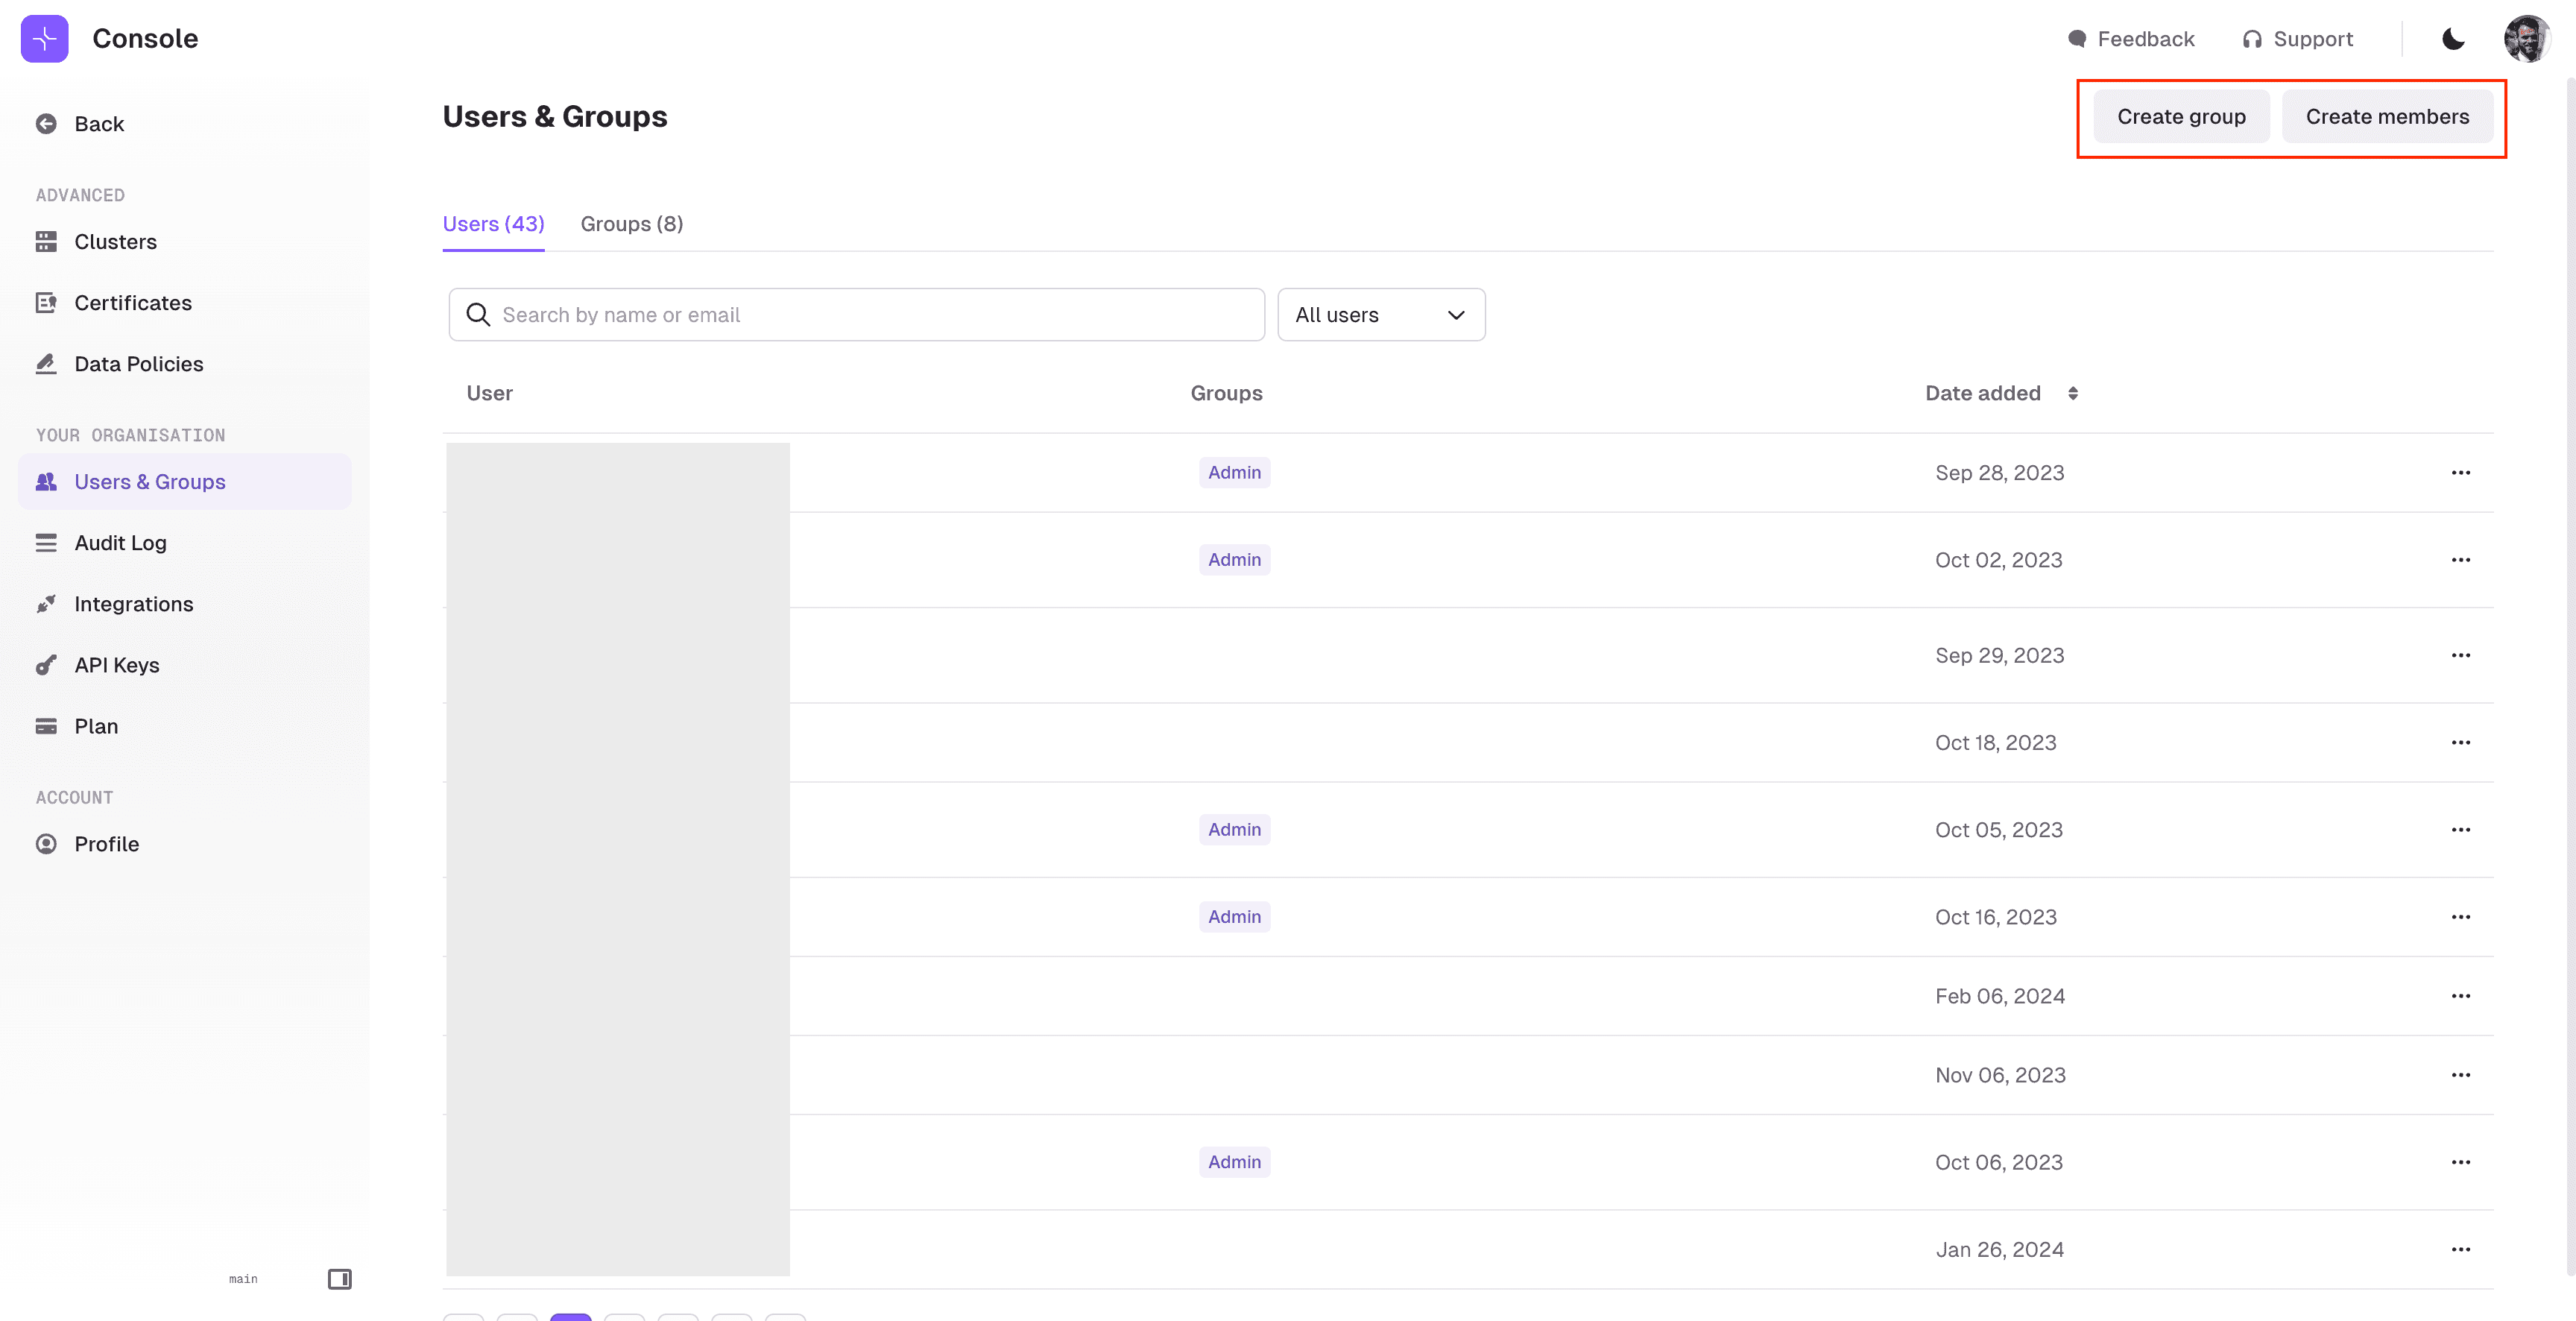
Invite users from the Users & Groups screen. Conduktor supports SSO (LDAP, OIDC) or basic authentication:
Next Steps
You now have Conduktor Console running on AWS. Browse topics, manage consumer groups, inspect schemas, and monitor connectors.
See the documentation for detailed configuration. Other deployment options: Docker, Helm.